
Git is a distributed version control system, developed by Linus Torvalds in 2005 and currently maintained by Junio C Hamano. There are many popular GUI tools and extensions are available to use git, but originally git was developed as command line tool, it is still fun to use git using command line, you will also understand under the hood magic done by GUI tools.
Why Version Control ?
Version Control Systems are used for Time Travel by
AstronaultsDevelopers.
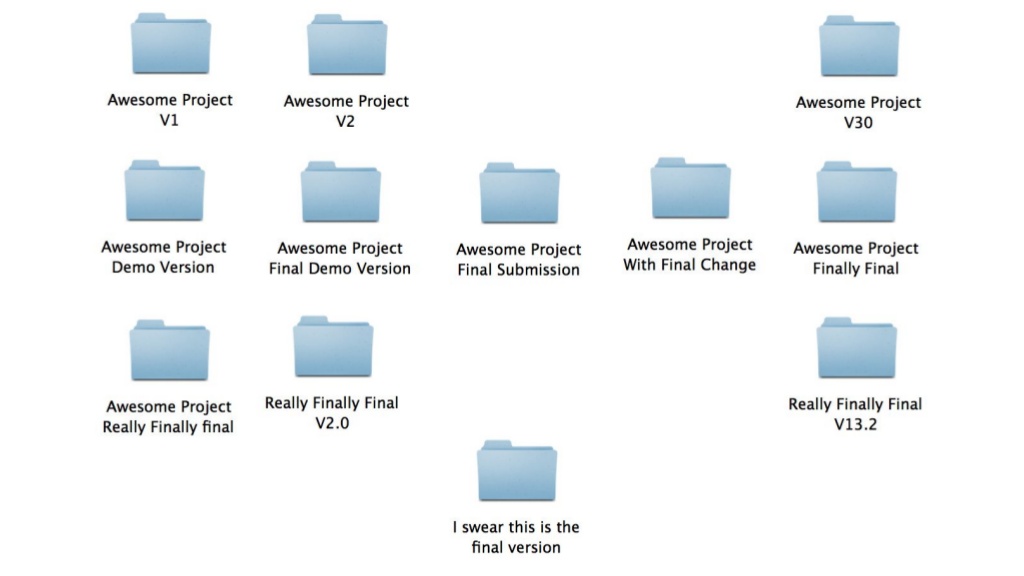
If you ever had your project copies likes above image, definitely you need a Version Control System. Version Control Systems maintains version of files without creating multiple copies, you need to commit the changes to store versions, you can go travel back and forth in commit history and get your files at any desired point of time. Now you can relate why I used the word “Time Travel”.
Git is not the only version control system, there are many, you can see a comparison in Wikipedia, There are many online services which provide git services, popular ones are GitHub, GitLab, BitBucket & Visual Studio Team Services(Yes, they do provide git, along with VSTS)

But you don’t actually need any one of them, to try out Git, because it is not just a Version Control System, it is a Distributed Version Control System, which plays major role for popularity of Git.
Distributed Version Control System
As I mentioned above we don’t need any git service to try out Git, but only until we don’t want to collaborate with other developers. Unlike distributed version control system in centralized version control systems there will be one server, which will contain repository and if we need to commit any change we have to connect to server and make the commit. SVN was very popular version control system, in which repository used to be central and developers used to have only working copy.
In distribute version control systems each user will have own copy of complete repository, here I’m using 2 terms “working copy” & “repository”. Working copy refers to the current version of source code in a repository, which mostly will be the latest version of source code, but not necessarily. Repository contains all the history of source code, you can traverse to any commit without contacting sever.
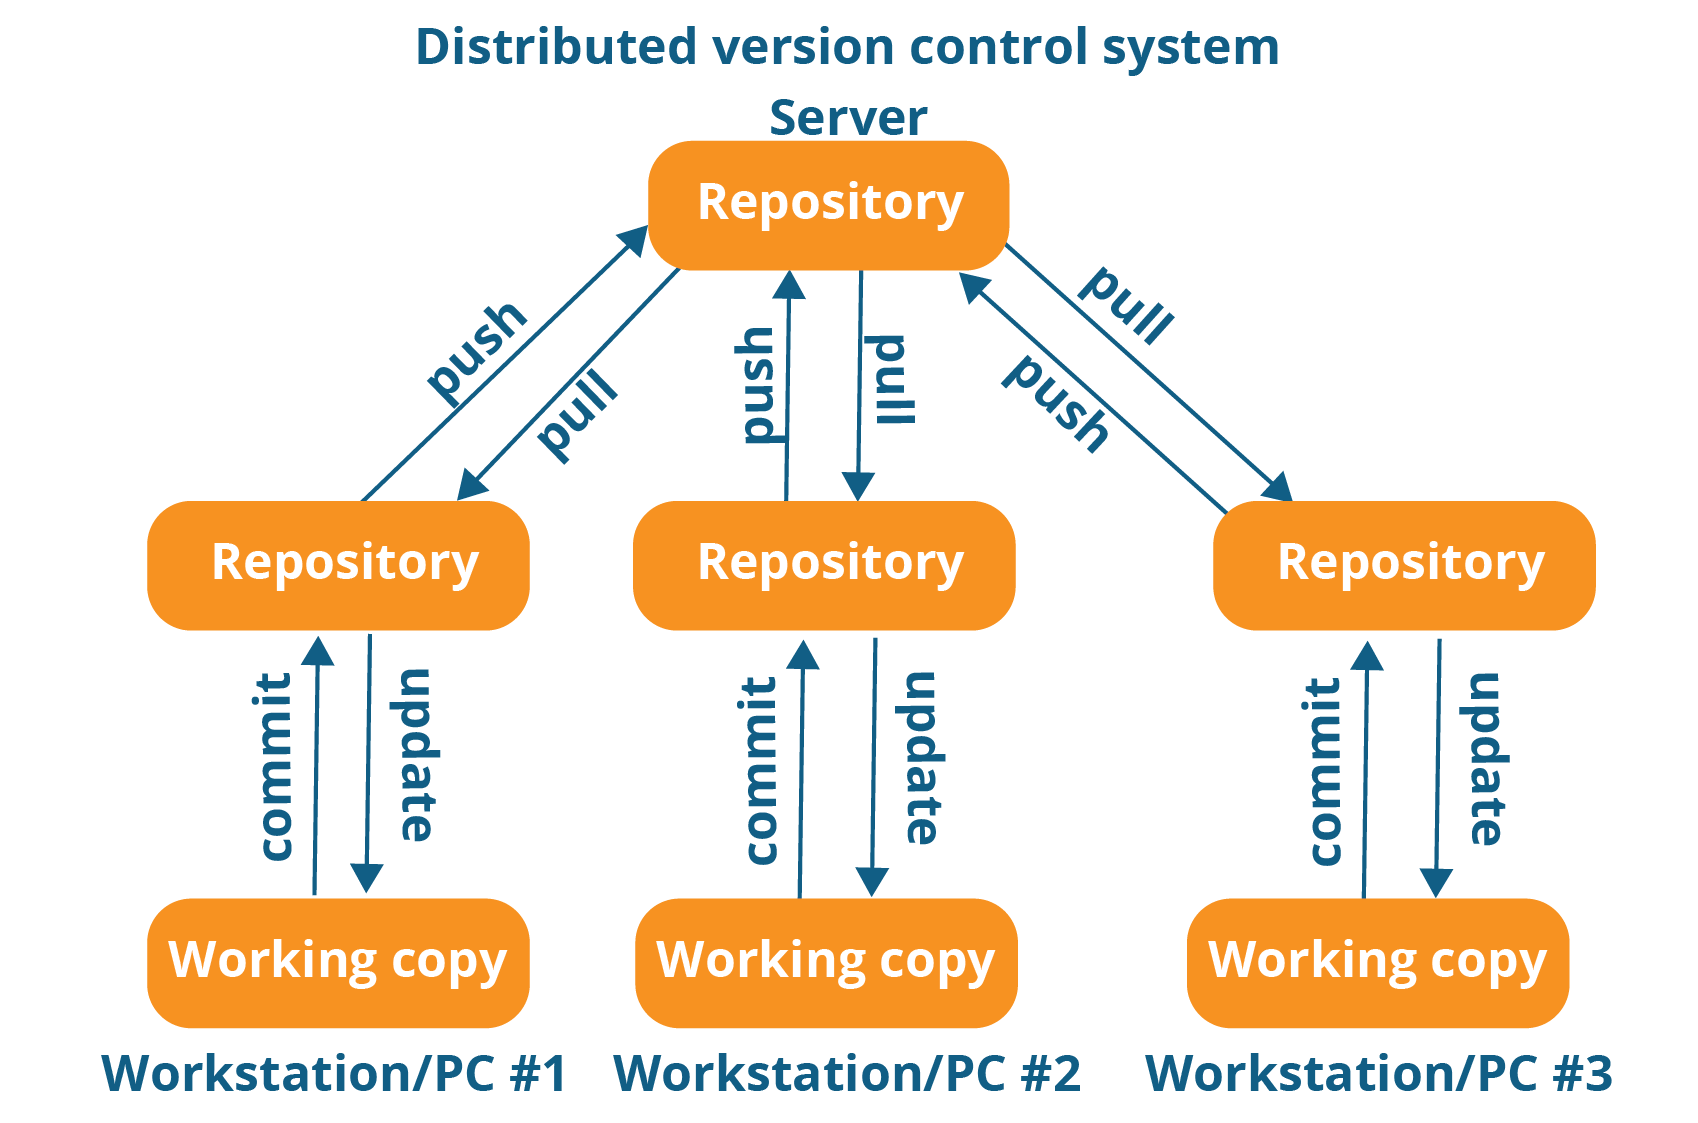
As you can see in above image, 3 workstations are working on same project, and each one of them has their own repository, which talks to one remote repository located in some server. Here each developer can work independently and can commit the source code in their local repository, he needs to push the code in remote repository only when he wants to share the code with other collaborators of the project. Once code is pushed in remote repository other can pull this into their local repository.
One point you need to notice here, that your Local Repository can have remote repository to push code in some server, but you can work locally as well without having any remote repository.
Installing Git
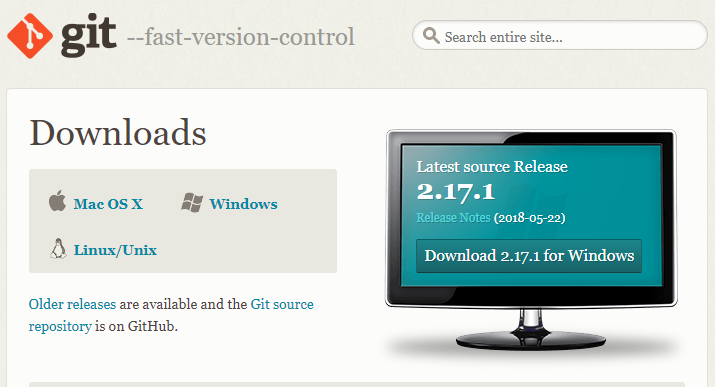
Download appropriate version of git according to your platform from https://git-scm.com/ and install.
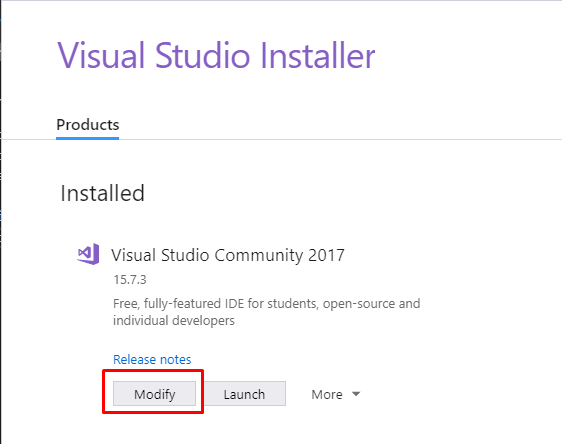
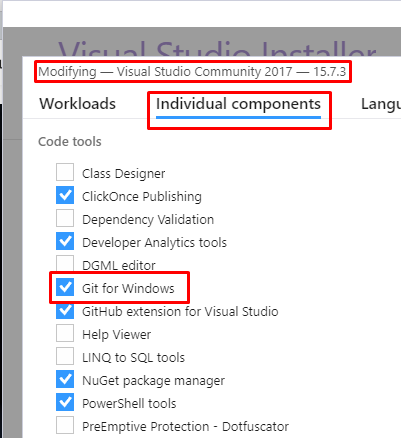
If you are using Visual Studio 2017 or higher, you can open Visual Studio Installer and click Modify.
Select “Git for Windows” in Individual components & modify to install git.
Verifying Installation
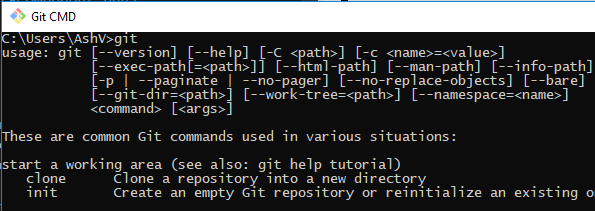
You will get Git Bash, Git CMD & Git GUI after successful installation of git. You can use command line in either Git Bash or Git CMD according to your preference. If Windows is your preferred OS then Git CMD is better choice & if you love Linux go for Git Bash. You can also run git commands from windows command prompt if environment variable is set.

Run git command to verify successful installation. All git commands should be written in small letters compulsory.

Configuring Git
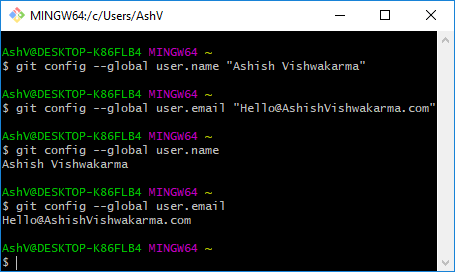
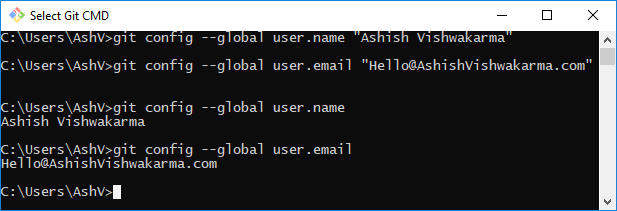
After installing git you have to set your name and email, which will appear in your commit logs. If they are already set you can also verify them.
$ git config
We can set or verify name & email using git config command.
Set Username
$ git config --global user.name "Ashish Vishwakarma"
Set Email
$ git config --global user.email "[email protected]"
Verify Username
$ git config --global user.name
Verify Email
$ git config --global user.email
git config in action
Creating New Repository
As explained above, repository is a place where source code is stored physically. git init command does this job for us. You need to goto folder which you want to make as repository and run this command, No matter folder is empty or has files, you can make that a repository.
$ git init
$ git init

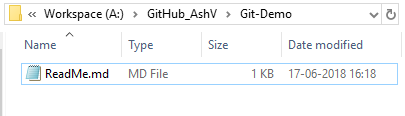
I created one folder in my file system with name Git-Demo & ran git init in this folder using command line. You can see the message Initialized empty Git repository in A:/GitHub_AshV/Git-Demo/.git/. Did you observe .git in message. Let’s verify in file system.
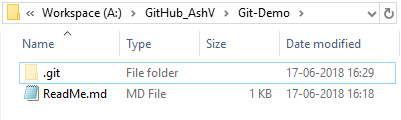
There is one hidden folder created with name .git, this folder is responsible for maintaining versions and other metadata related to repository. (Hidden files & folder should be visible in your OS settings to see this folder).
Status of Repository
To get the current status of repository git status command is used. This command is very frequently used, let’s see what is status of our repository after git init.
$ git status
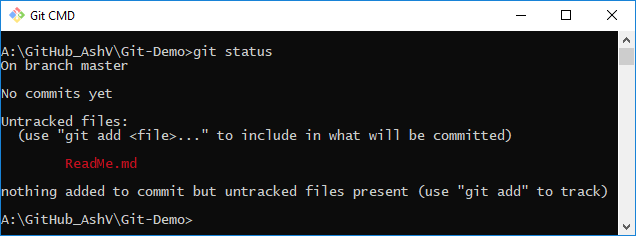
Hmmm, ReadMe.md is untracked 🤔, Untracked file means it will be there in file system but git will not be aware of it. Let’s add it to repository.
Adding/Staging Files to Repository
If you have observed in message of git init it says “Initialized empty Git repository”, git init initializes repository with no files even if you have files present in that folder. To add files in repository ‘git add’ command is used.
$ git add
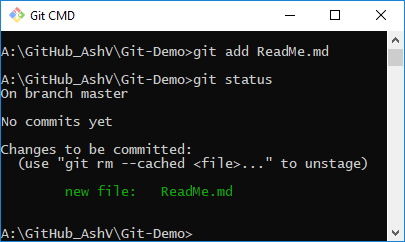
Let’s add ReadMe.md file to git and check the status
$ git add ReadMe.md
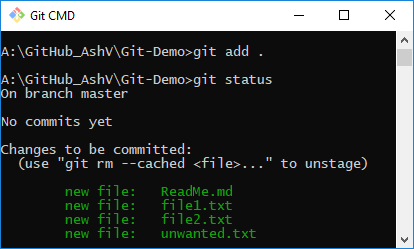
If we have multiple files, then we have to run this command for each file, or we can add all files with git add . and remove/unstage unwanted files later.
I created 3 more files in folder “file1.txt, file2.txt & unwanted.txt” and adding them to repository with git add ..
$ git add .
Removing/Unstaging Files in Repository
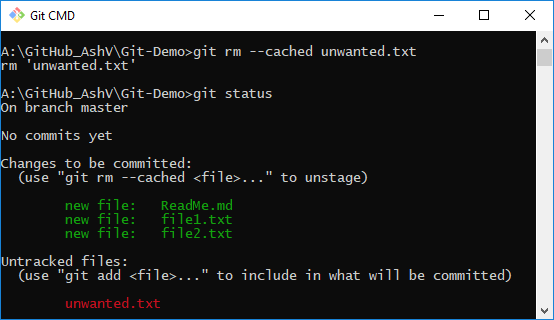
If you want to remove some staged file from repository ‘git rm’ command is used. If you wish to just unstage file from repository but want to keep in file system you need to use --cached in git rm command.
$ git rm --cached unwanted.txt
Commiting the Changes
git add command just add files to repository, but to log your changes/make versions you need to commit your changes using git commit command. So far we have created 3 files, let’s commit them. While committing changes we should provide proper commit message which describes what change are made in this commit. -m is used to provide commit message.
$ git commit -m "adding 3 demo files"
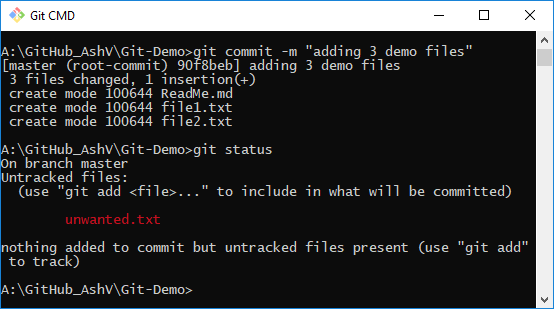
You can observe here before commit those 3 files were visible in green under “Changes to be committed” section, now they are committed that’s why not visible here.
Making Further Changes in Code & Committing Them
After commit if you make changes to existing files or new files, you need to again run git add to stage them & git commit to commit the changes. So far everything we did in repository is local in our machine. Let’s see how to Push changes to server/remote repository.
Adding Remote Repository
Remote repository is the one which is located in server, and different collaborators push changes to it, which can be taken by other collaborators.
To have an Remote repository we can use any of the services including GitHub, GitLab, BitBucket & Visual Studio Team Services. Basically they all work in same way, so if you are able work with one, you can wok with others too. We will take GitHub as example here.
Private vs Public Repository
Public repos are used by Open Source projects mostly, anyone can view their code and commit history e.g Selenium, .Net Core etc. Private repos are used when you don’t want to make you code public e.g your client’s code. Except GitHub above mentioned other services are providing private repositories for Free. By the way you won’t feel any difference between both while working.
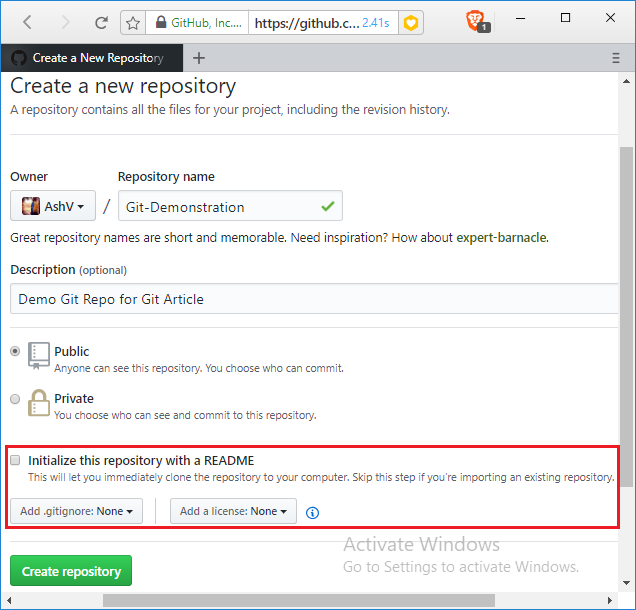
Create Repository in GitHub
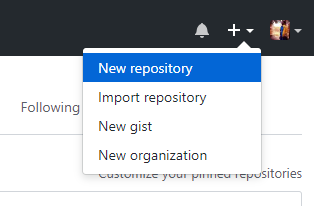
Navigate to (https://github.com)[https://github.com] login into your account or create one if don’t have already. And click on create new repository.
You can give any name here, it could be different than your folder name in local. I have given different name Git-Demonstration. Don’t select anything in highlighted section those are for completely new repository but here we have already created repository in local.
After click on “Create Repository” you will see similar screen with command given.
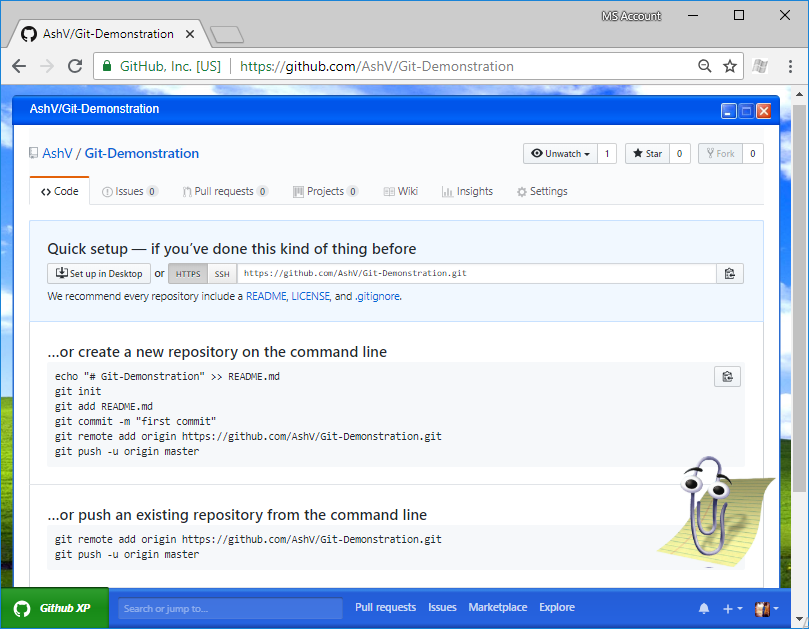
Link Remote Repository
You can observe git remote command in above image, copy and run it in your machine to add remote repository in your local repository.
$ git remote
$ git remote add origin https://github.com/AshV/Git-Demonstration.git

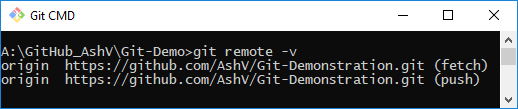
To verify remote URL you can run this command with -v
$ git remote -v
Pushing Changes To Server
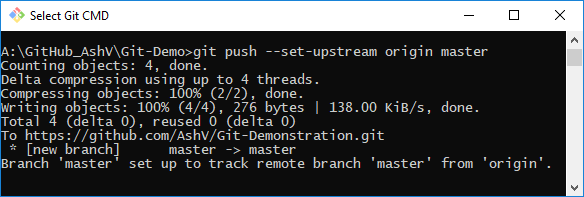
With git remote now our repository knows where is our remote server, but to push changes there we need to run git push, while pushing to remote for the first time we need to set remote as upstream for the current branch, which is master by default. (branching in git is very popular and useful feature, as this article is intended for beginners, so I will be covering them in further article). Run below command to set upstream.
$ git push --set-upstream origin master
Here is short version of above give more descriptive command.
$ git push -u origin master
Taking latest from Server
While working in project with multiple collaborators then it’s always good idea to take latest before starting to make changes in repository to avoid conflicts and warnings while pushing. ‘git pull’ does this job, I’m making some change in remote repo to show demo, then I’ll pull them in local.
$ git pull
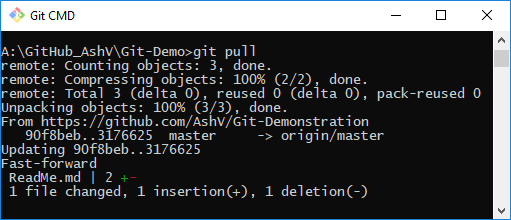
You can see latest changes made ReadMe.md are retrieved to local.
Conclusion
A quick recap, we have explored these commands in this article.
- git config
- git init
- git status
- git add
- git rm
- git commit
- git remote
- git push
- git pull
You can start using git with command line with them. Further commands will be covered in upcoming articles. You can explore commits made in this article at https://github.com/AshV/Git-Demonstration/commits/master
Thanks for reading!
